

How to Media Manage Your Timelapse Footage
Preface Note: Because of the nature of asset structure with timelapses, the process outlined below is ONLY used for timelapse media management. My process for managing all other assets is different. I will do a follow up post showcasing that method soon.
Media management to me, is a lot like accounting. It isn't the most fun thing to do but is fundamental to the success of your business.
Having a well established system and way of doing things is critical. Because of the large file sizes of RAW images, you will want to have a solid workflow to ensure that you keep your clips organized and cataloged. Especially when shooting timelapses, staying organized and having a system that allows you to easily find assets will make your life much easier down the line. What I want to do with this post is walk through how I manage my timelapse footage. One thing to note is that there are many approaches to this - the key is having a system that works for you and your team.
Before we jump into the nitty gritty details, I have included the short version below:
Import Footage into Computer.
Quick preview and rename in Photo Mechanic.
Copy Photos to a second hard drive.
Import into LR Timelapse and follow Prompts.
Note that you are able to do an export directly from LR Timelapse - however, being able to do batch exports from After Effects will be much more effective if you have multiple timelapses to export.
Open After Effects and import image sequence.
Refine composition in After Effects as needed.
Batch export low resolution and full resolution files to a working drive to go along with the raw files. Backup to another drive. Copy the 1080p (proxy) version to a master drive for reference so you have access to your full library of shots.
Backup final exports to server or third hard drive.
Now, lets take a closer look at the details of the process.
Managing Media
Working with your media can be done in two ways. Depending on the budget, we will either have a DIT/DMT (Digital Media Technician) on set that deals with our assets on location or we will deal with our media after the shoot. If I deal with our media after the shoot, I simply keep a log that keeps track of what was shot on what card and then tape over my media when it has content on it to keep track of what needs to be offloaded and what is fresh media. I will also flip the card over in the case that carries my cards so there is no confusion at all.
Now one thing I want to also mention is the use of spaces in your file names. I used to fill all spaces with _ as some programs don't deal well with spaces. These files used to appear as Pier_5_Sunset_Static_30mm.NEF. However, I have moved to using spaces as I have yet to run into any issues after using spaces and will continue to do so until something changes. I just prefer the look of spaces over _. Personal preference - use what you think is best based on the risk you want to take with your files.
1. Importing Assets
When importing assets, I do this directly through the desktop 'FINDER'. I find this works best for me and has the most accurate time estimations.If you are not a fan of this method or interested in stand alone programs that also do checksums, than checkout Shotput Pro and Red Giant's Offload. I've used both and they are great. Personally, I just prefer the basic method.

Once I've offloaded my media into their given folders, I then move into Photo Mechanic.
2. Previewing and Renaming in Photo Mechanic
For me, my process starts with Photo Mechanic.
Unfortunately the program is a bit pricey, if you are a timelapse shooter, I feel that it is invaluable.
To import clips, simply navigate to the folder you want to work with in the left pane.


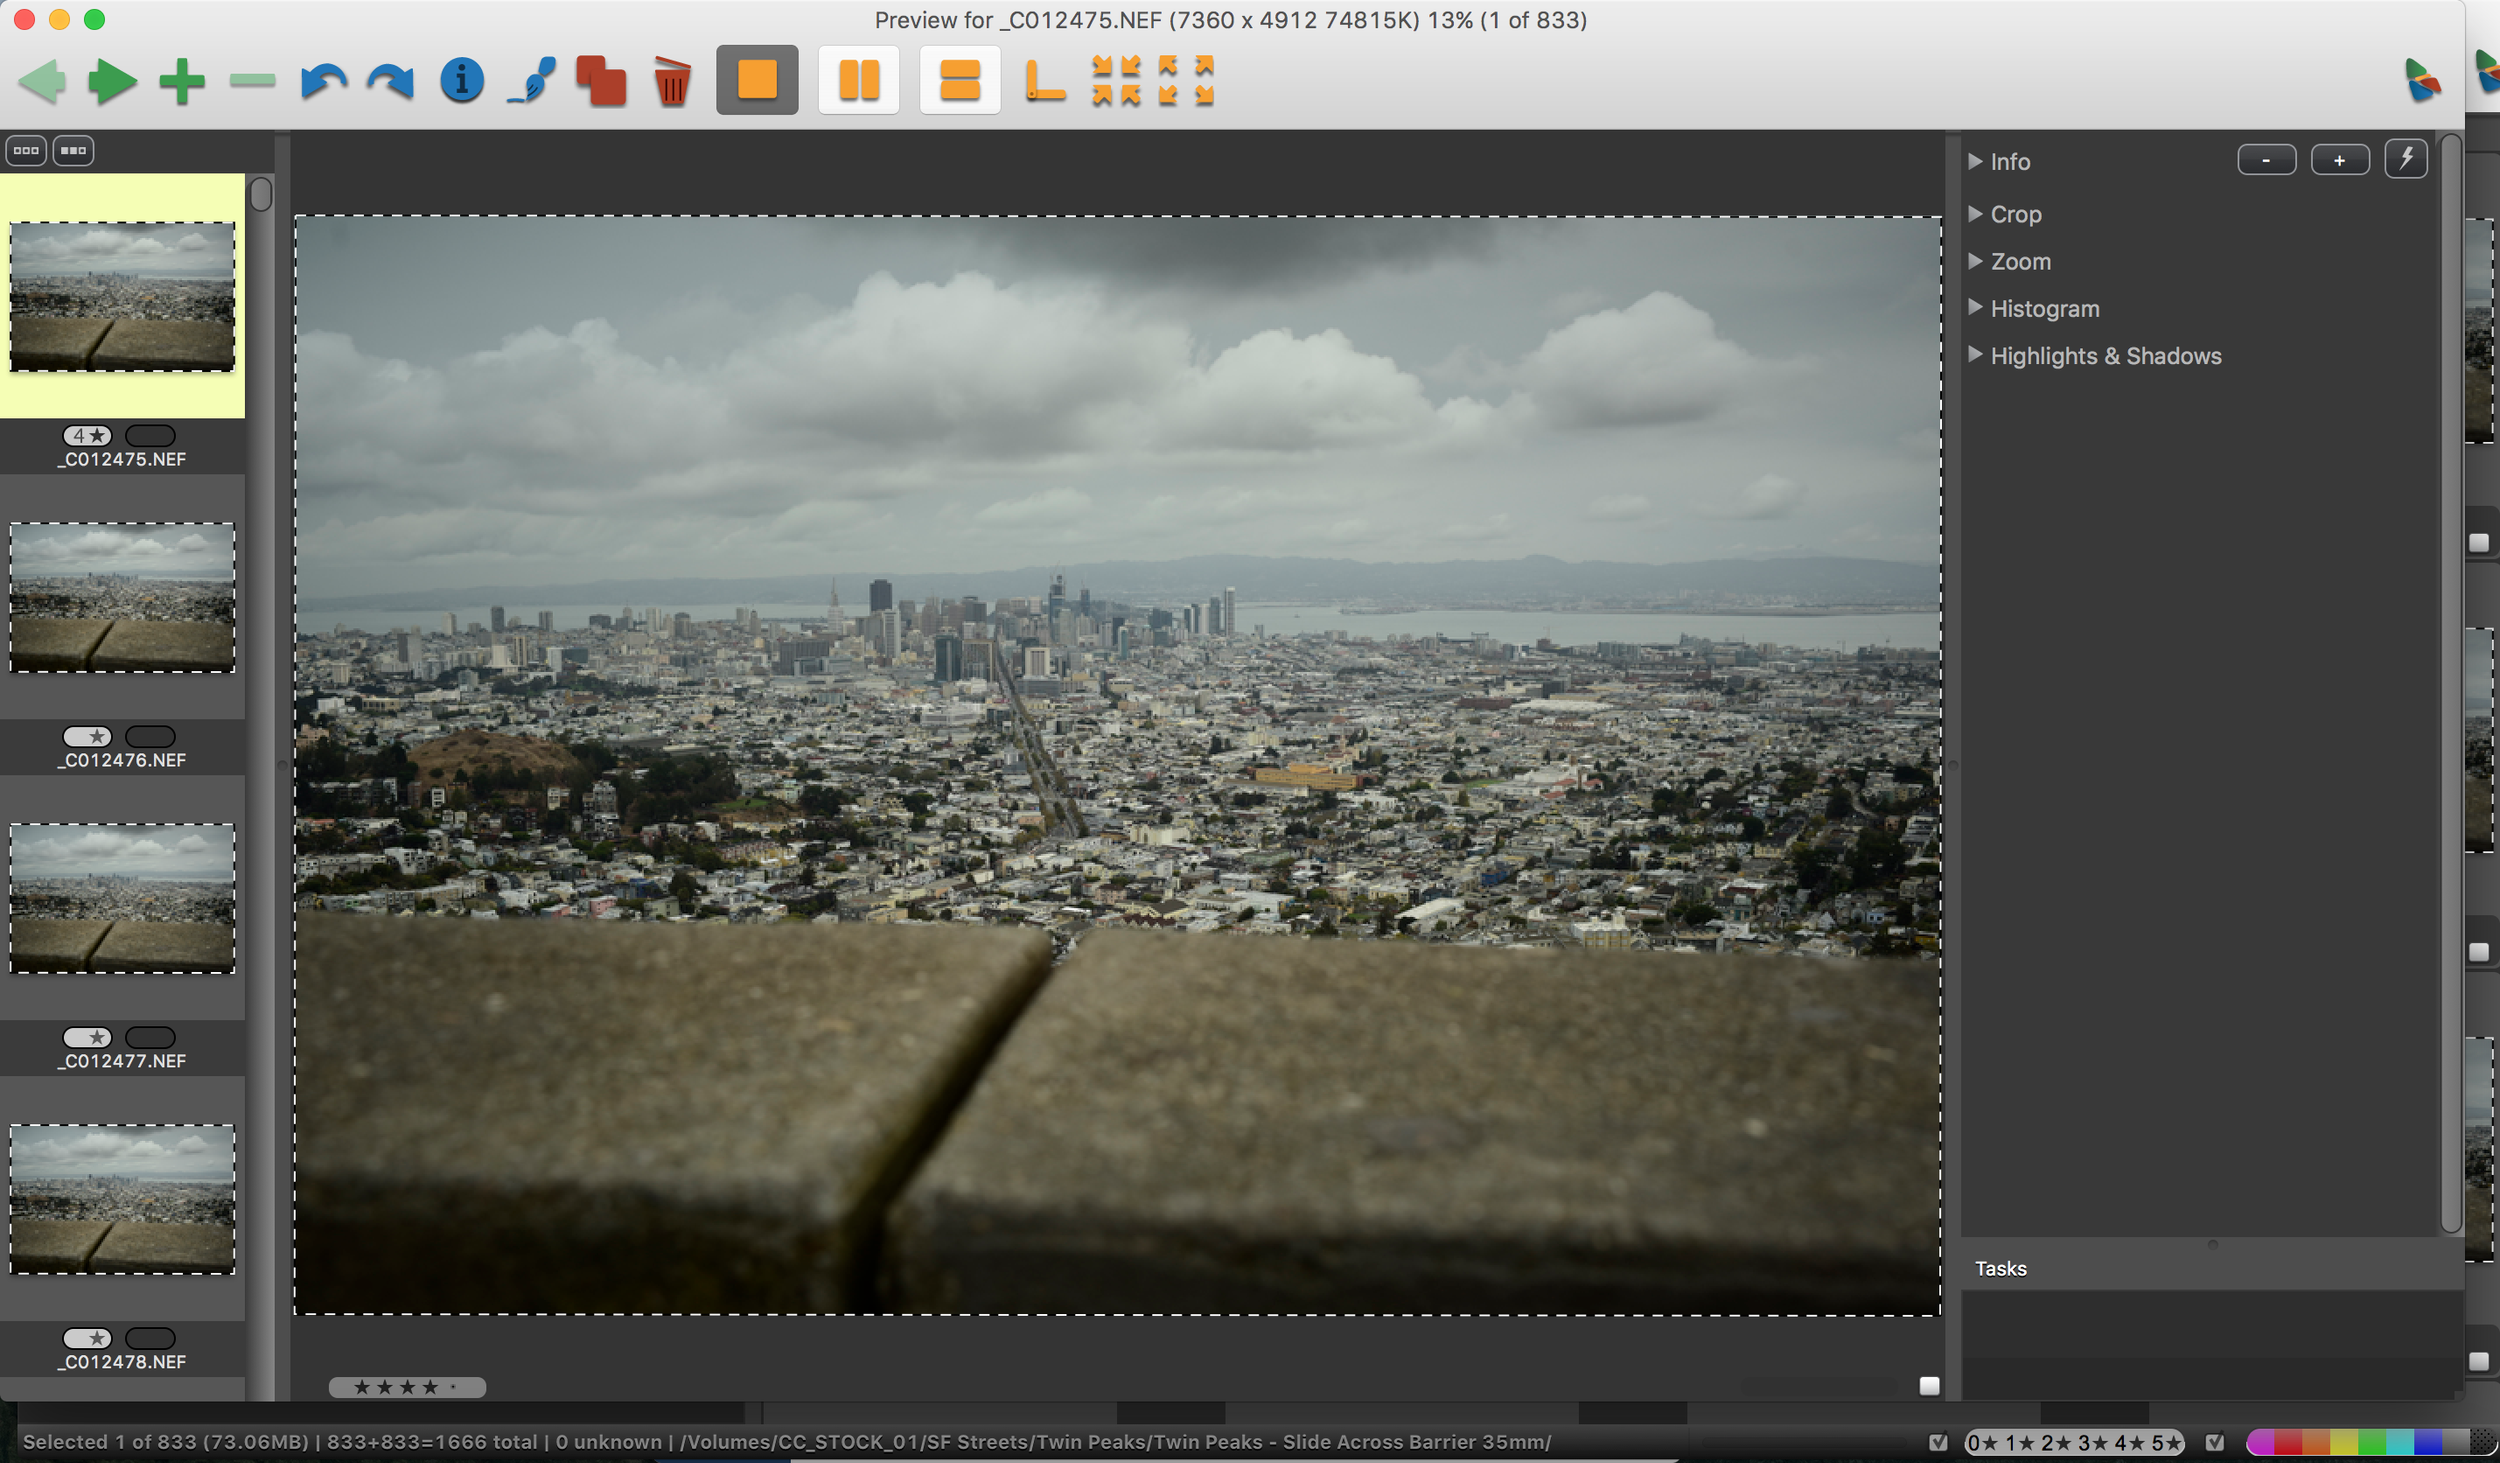
Previewing in Photo Mechanic
This program is an absolute beast in its ability to preview your files. I am not totally sure how they manage to deal with the extremely large images from the D810 but it works like magic and allows you to scrub through your timelapse immediately after ingesting. I know of no other program that is able to do this. If anyone else knows of one, please let me know!
I used to shoot low resolution jpegs to go along with the raw files so I was able to quickly see what work needed to be done to each shot. However, with this previewing ability, I no longer shoot these low resolution proxies to work with.
Renaming Photos in Photo Mechanic
Another feature that I use Photo Mechanic for is renaming. Although I am able to rename in other programs such as Lightroom, by doing my renaming at this stage, I am able to stay organized from the start. Because I am already using this program to make notes on things that need to be done to my timelapses, I am able to get this step out of the way early in the process.


3. Copy Renamed Photos to a Second Hard Drive
Once you have renamed your files, you will then want to copy your timelapse shots to a second hard drive. If I am shooting these timelapses for a client, than I will copy the RAW files to a third hard drive as well. Make sure you also leave the media cards untouched until you have these backups completed. Do not format or erase your cards until you have AT LEAST two copies.
4. Working with the Assets
Now the fun part! Once you have imported your photos and renamed them, I then jump into LR Timelapse and follow through the process. To do this, simply use the buttons from left to right.

Select the amount of keyframes you want in your timelapse. This is critical if you shoot in manual or want to do creative transitions through your shots. Also, if you are shooting day to night / night to day timelapses, you will want to play with the amount of keyframes (images to correct) as well.

Once you select the amount of keyframes you want and click save, you will have to wait until LR Timelapse if finished prepping your files before you can move into Lightroom. You will see a progress bar on the left side of frame superimposed over your timelapse image.


Once this is done, you will then want to drag the 'drag to lightroom' icon into the import dialog in Lightroom.
5. Create look / balance images in Lightroom
Once you have prepped the files in LR Timelapse, you will then want to jump over to Lightroom to balance out your image and process the keyframes that were created inside of LR Timelapse.

To access the frames created in LR Timelapse, navigate to the filters and select 'rated'.


Once you have processed your images, select your images and save the metadata for those files.

Now jump back over to LR Timelapse and finish the process.

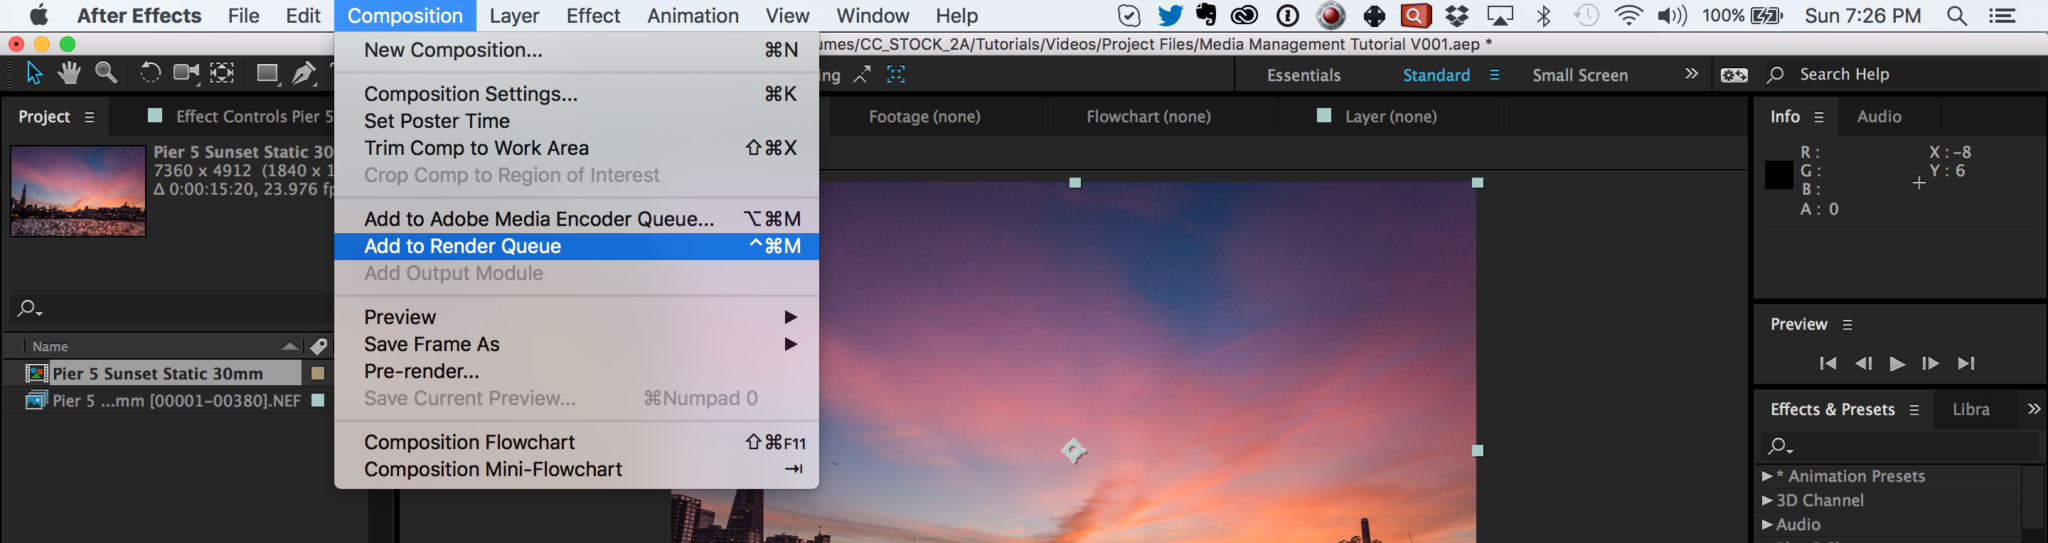
5. Open After Effects and import image sequence.
Once you have finished working with your files in LR Timelapse and Lightroom, you can then jump into After Effects. The biggest perks of using After Effects is its ability to composite / work with your images as well as batch export multiple timelapses in a variety of formats.
Navigate to the folder with your timelapse images and select the first image of the sequence. Click import and okay past the Camera Raw window.

Once your timelapse is imported into After Effects, drag the timelapse file onto the composition icon.

Once you have created the composition, you can then do any modifications you want to the shot. This will be totally up to what is needed for the given shot. When completed, you can then move to the export itself.
6. Batch export low resolution and full resolution files to a working drive to go along with the raw files.
There are a few different files types that you will want to store. When I am archiving, I keep multiple formats of my timelapse. Data storage is cheap compared to the costs that are associated with capturing your shots and as such, it is important to ensure your files are safe.When I am cataloging, I keep multiple formats:
LOW RESOLUTION MOV
FULL RESOLUTION MOV
RAW FILES with METADATA
I will copy these contents to two hard drives and then on a third hard drive I will keep the LOW RESOLUTION file in order to have all my time-lapses centralized as these timelapses will span over multiple drives as your collection grows.
To export, navigate to composition, add to render queue for the given sequence.
Select the video codec you want to export to. I use ProRes 422. If you are on a windows based computer, you might want to consider Cineform.

Lastly, select the folder where you want to save your timelapse.

Once you have created the batch list of low resolution and high resolution exports, you can then hit render and let the program work its way through all the timelapses.
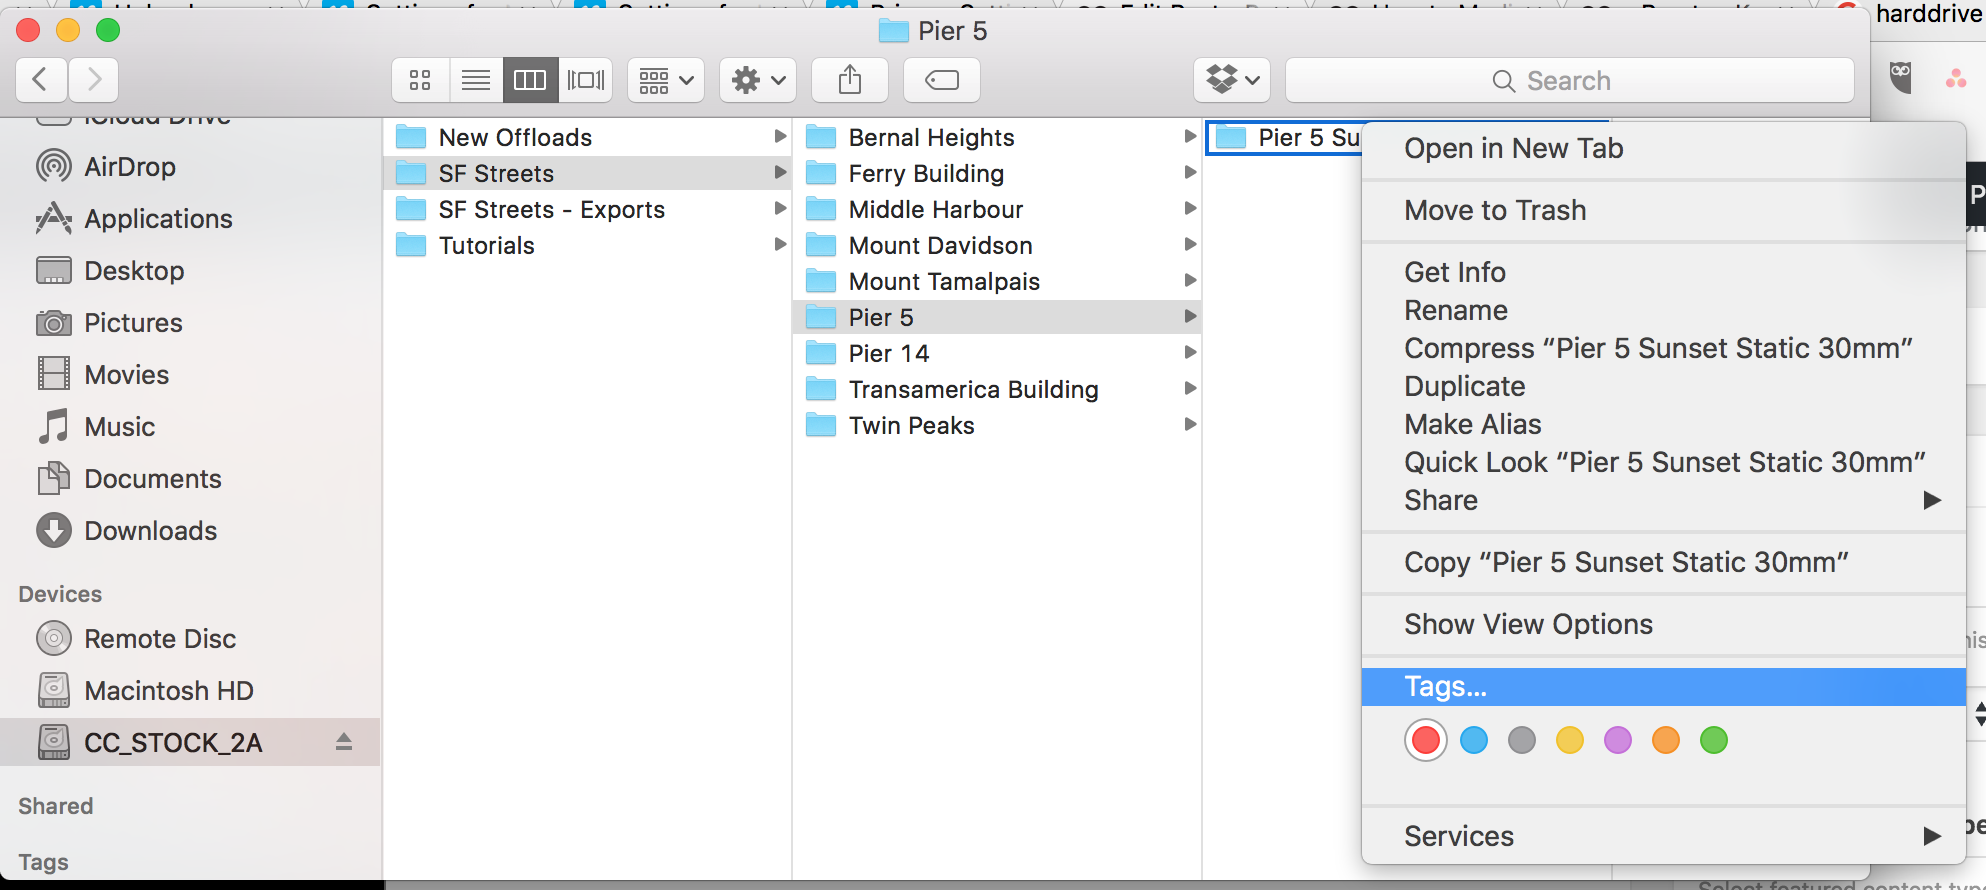
7. Backup final exports to server or third hard drive.
Lastly, once these timelapses are all exported, I will then mark the folders with the RAW files with a tag so I know that the given timelapse has been exported.
I then will copy the final timelapses to either a server or another hard drive for easy access down the road.
Final Thoughts
As mentioned, media management is a very important part of the process and having a system that works for you is really all that matters. The above method is my go-to for timelapses only. Because I will on average shoot at least 10-20 timelapses per shoot day, this is really the only way that works for me as my library continues to grow. I'd be happy to hear if you see any ways to improve this process.