

How to Smooth Out Your Timelapse Footage
Finding ways to improve the way in which I work with my timelapse footage as well as ways to create unique looks is a huge passion of mine. Whether through refining the look and feel or total experimentation, this desire definitely keeps me on my toes. As of recent, I set out to find a way to replicate a plugin I used to rely on heavily for smoothing out timelapses while creating a 'silky' look. The plugin itself was called CHV Time Collection.
CHV Time Collection's Long Exposure added up a certain time range and created an effect as if you have used a long exposure time with your camera. Moving objects appeared as a blurry mass. Non moving objects don't change their shape and will stay clearly visible.
Unfortunately, the plugin wasn't updated and was only compatible with Final Cut Pro 7. Because of that, I was forced to look elsewhere for a solution. I was able to come up with three different approaches based on the type of shots you are trying to work with. Each of these approaches has a different look - while each also won't work for every situation. Shooting your shots correctly in camera is ALWAYS a better approach but if for whatever reason you forget your ND filters or mess up your shutter speed (or you want to create a unique look), this one is for you!Now before I jump into the three ways to fix the staccato effect in post production, I've attached a list of filters I use for my shots.
LEE Filters 150 x 170mm SW150 Soft Edge Graduated Neutral Density Set
LEE Filters 150 x 150mm SW150 Big Stopper Neutral Density 3.0 Filter (10 Stop)
LEE Filters SW150 Mark II Lens Adapter for Lenses with 77mm Filter Threads
LEE Filters SW150 Mark II Lens Adapter for Nikon AF-S NIKKOR 14-24mm f/2.8G ED Lens
LEE Filters SW150 Mark II Filter System Holder for Wide Angle Lenses
There is a slight cool colour cast from the Big Stopper but I find that for the most part, this can be fixed when working with your images in post. Without futher ado, I've attached the post production methods below. With each of these methods, keep in mind that they will only work with static timelapses. If you are doing a motion controlled timelapse, you will want to make sure to use ND filters.
1. Echo Effect
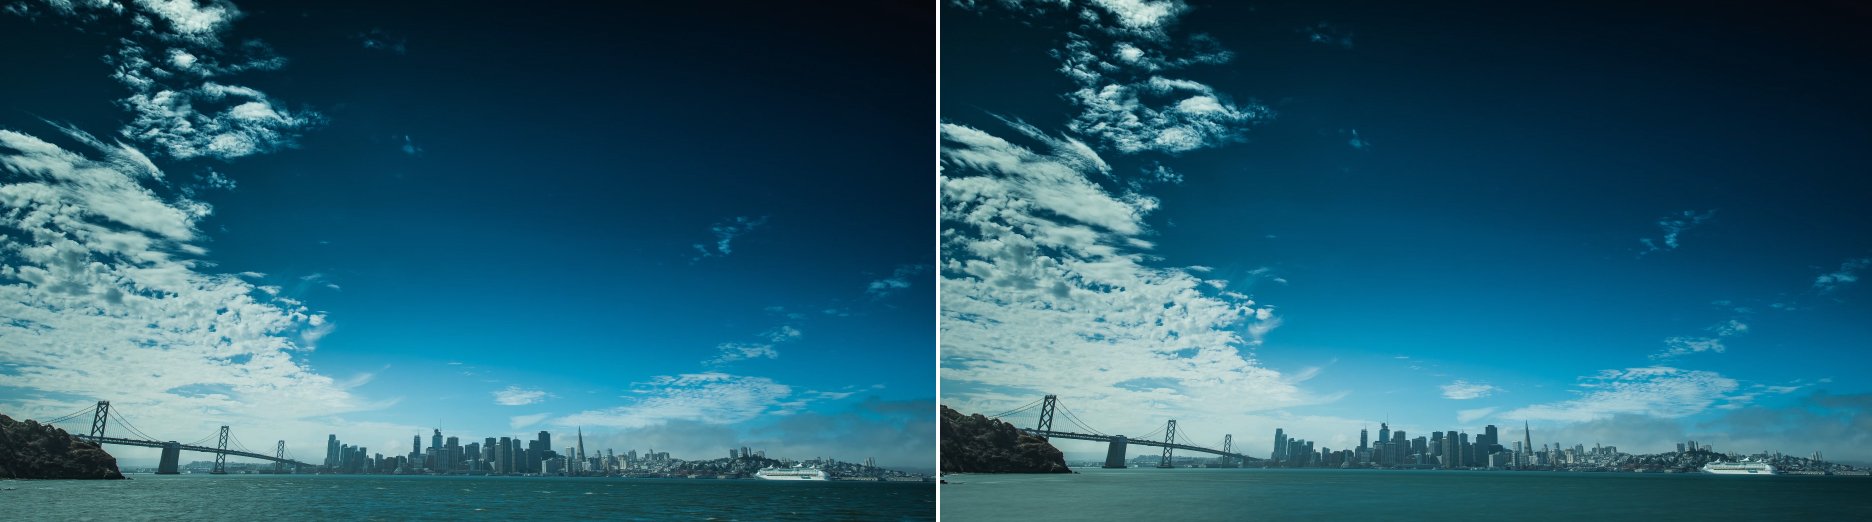
This is the quick and dirty approach. This effect is a great way to quickly modify the look of your shot. It will help remove some flicker and smooths out clouds to create a unique look. However, it won't work well for objects moving close to the camera.
The image on the left is the before image and the image on the left is the after image.

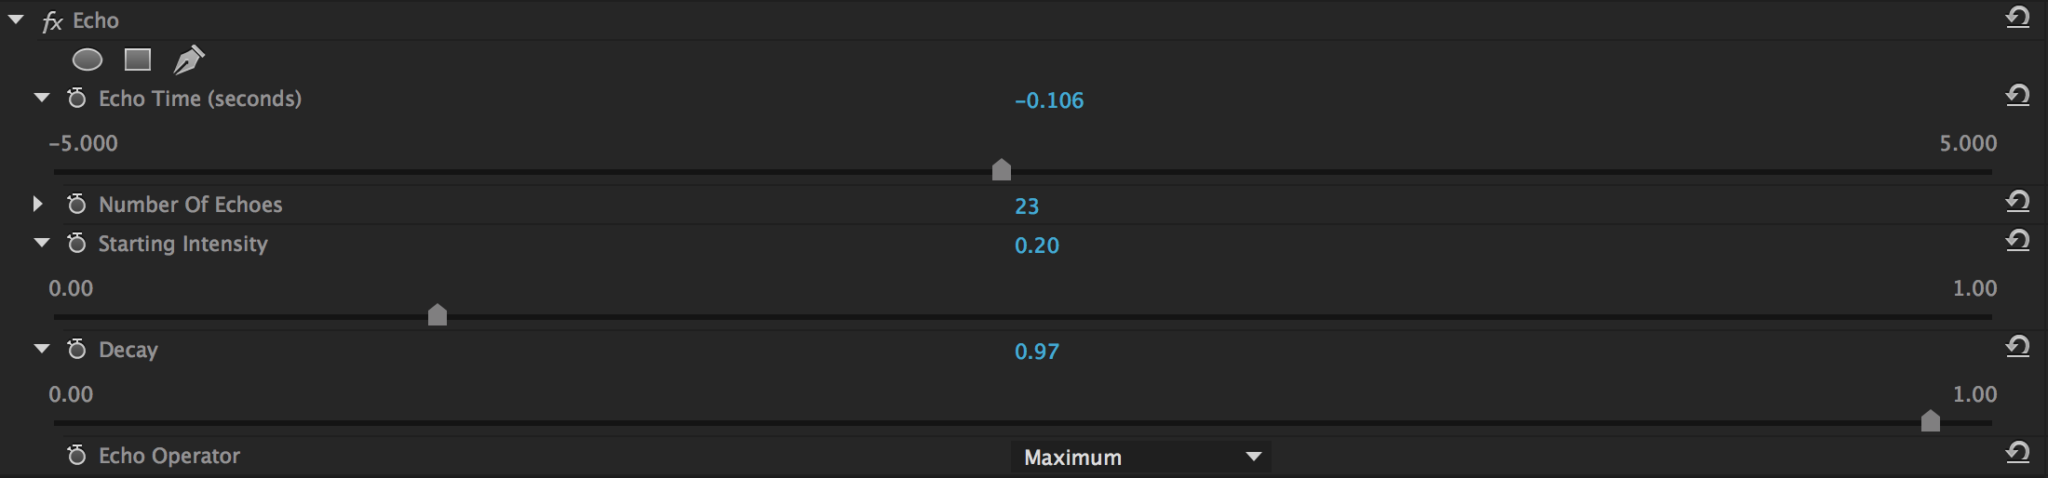
To apply the effect, navigate to the VIDEO EFFECTS / TIME folder in the effects panel. Once applied to your clip, use the echo time, number of echos, intensity and decay sliders to refine the look of the effect. You will need to play a bit around with these settings as the effect each shot slightly different.
This approach is definitely not as flexible as the plugin but helps in a pinch. It is great because the effect is built right into premiere pro.
2. Effect Layering with Opacity Shifts
The second approach is the effect layering approach. To utilize this approach, you will need to use After Effects as it is much easier to assemble based on the way the program works versus trying to do in Premiere Pro.
The image on the left is the before image, the image on the right is the final image.

To apply this effect, you will need to create multiple copies of your given timelapse. Once you create multiple layers in your composition, bump each layer over 1 frame.

Once you have bumped each layer over one frame, you will want to select all layers and hit 'T' to toggle open the opacity settings.

Below I have attached the opacity settings I use when applying this effect. The reason each layers opacity decreases is to ensure that all layers remain visible, however subtle that may be. Choosing the amount of layers you want to use is totally up to you and the look you are going for.
1st layer = 100% (100 / 1)
2nd layer = 50% (100 / 2)
3rd layer = 33% (100 / 3)
4th layer = 25% (100 / 4)
5th layer = 20% (100 / 5)
6th layer = 17% (100 / 6)
7th layer = 14% (100 / 7)
8th layer = 12% (100 / 8)
9th layer = 11% (100 / 9)
10th layer = 10% (100 / 10)
11th layer = 9% (100 / 11)
12th layer = 8% (100 / 12)
----
13th layer = 7%
14th layer = 6%
15th layer = 5%
16th layer = 4%
17th layer = 3%
18th layer = 2%
19th layer = 1%
3. Pixel Motion Blur & CC Wide Time
The last option and in my opinion the best method is the Pixel Motion Blur approach. For this approach, I use both the Pixel Motion Blur and CC Wide Time effects. Essentially, this is taking the stacking method and adding motion blur to the hard edges.
Below I have attached two images - one with the Pixel Motion Blur effect applied (top left) and another where ND filters were used (top right). Although not perfect, you can see that we are able to get a look that is pretty similar to what it would look like if shot correctly on location.

To apply the effect, you will want to navigate to the pixel motion blur and CC Wide time effects.


Once applied, I leave the Pixel Motion Blur at the default settings and then change the CC Wide Time to 16 forward steps and 0 backward steps.

Once completed, I then duplicate the layer (Command + D).

From there, I then delete the CC Wide Time from the top layer inside the layer effects panel. Once deleted I then change the Shutter Samples to 10.

At this point, you can start to refine the effect to work for your given scenario or to create the look you want.
Composites
The last thing I want to talk about with this tutorial is how you are able to use this effect to create a more pleasing images by removing the staccato effect from distracting elements through compositing. To apply this effect, you will want to pre-compose your sequence that you created using one of the methods outlined above.

After you precompose your composition, drag a copy of your original shot into the sequence you are working in.

Now, use the pen tool to cut out the element you want to localize for your timelapse.

Once you have trimmed your layer, you will then have your final composited image. The image on the left is the before image and the image on the right is the final output. You can see that the water is smoothed out.
Wrap Up
As always, capturing your timelapse correctly in camera is the best way to go. However, if for whatever reason you want to clean up your shot, one of these methods should work for you. If you have any way to improve the process, please let me know as I am always open to better methods!